Windows 10 Blue Screen On Startup
How to troubleshoot and fix Windows 10 blue screen errors
If you're getting a blue screen on your PC, in this guide, we'll help you to troubleshoot and quickly fix the issue on Windows 10.Note: For more helpful articles, coverage, and answers to common questions about Windows 10 Contact Microsoft Support Phone Number +1-800-201-4243
On Windows 10, a Blue Screen of Death (BSoD) — also referred as "blue screen," "stop error," or just "system crash" — will happen after a critical error that the system is unable to process and repair automatically.
Usually, you may see a blue screen while upgrading to a new version of Windows 10, during startup, or suddenly while actively using the computer, and the most frustrating thing is that it's just a screen with a blue background and a sad character face without enough information to figure out the problem.
Note: For more helpful articles, coverage, and answers to common questions about Windows 10 Contact Microsoft Support Phone Number +1-800-201-4243
The screen will give you a hint message, such as "Your PC ran into a problem and needs to restart. We're just collecting some error info, and then we'll restart for you." Or general stop error codes (such as VIDEO_TDR_TIMEOUT_DETECTED, PAGE_FAULT_IN_NONPAGE_AREA, CRITICAL_PROCESS_DIED, SYSTEM_SERVICE_EXCEPTION, or IRQL_NOT_LESS_OR_EQUAL) or hexadecimal code (such as 0x000000D1, 0x0000000A, or 0x0000007B), but they're just hieroglyphics for most users.
Although stop errors are complex, almost always is a problem with a quality or feature update, buggy driver, incompatible software or hardware related issue.
In this Windows 10 guide, we'll walk you through the steps and possible solutions to fix your device after a blue screen error.
- How to fix blue screen problems during upgrade on Windows 10
- How to fix blue screen problems with desktop access on Windows 10
- How to fix blue screen problems without desktop access on Windows 10
How to fix blue screen problems during upgrade on Windows 10
When upgrading to a new version of Windows 10, it's common to see blue screen errors as a result of an old program, third-party security software, or damaged installation files. Usually, when a critical error occurs, the setup will rollback the device to the previous installation, but it won't fix the problem (that's up to you to figure out).
If you're getting errors during the upgrade process, you may be able to fix the problem by uninstalling non-essential apps, clearing out a bad download, disconnecting non-essential peripherals, or performing a clean installation of Windows.
Note: For more helpful articles, coverage, and answers to common questions about Windows 10 Contact Microsoft Support Phone Number +1-800-201-4243
Uninstall apps
To uninstall any app that isn't required during this, use these steps:
- Open Settings.
- Click on Apps.
- Click on Apps & features.
- Select the app that may be causing issues and click the Uninstall button.

- Click the Uninstall button again.
- Continue with the on-screen directions (as needed).

Once you complete the steps, you may need to repeat the steps to uninstall additional apps. After the upgrade, you can reinstall the apps again.
Download upgrade files again
There's a chance that you're seeing a blue screen because of damaged installation files. If this is the case, you can use the Settings app to clear the previous files to allow Windows Update to re-download them again using these steps:
- Open Settings.
- Click on System.
- Click on Storage.
- Under the "Storage sense" section, click the Free up space now option. (If you're running the Windows 10 May 2019 Update, under the "Local Disk" section, click the Temporary files item.)

- Clear the preselected options.
- Check the Temporary Windows installation files option.

- Click the Remove files button.


After you complete the steps, try to upgrade to the latest version of Windows 10 using Windows Update.
If the problem is occurring using a USB installation media, then use the Media Creation Tool again to recreate the bootable media.
Note: For more helpful articles, coverage, and answers to common questions about Windows 10 Contact Microsoft Support Phone Number +1-800-201-4243
Disconnect unnecessary hardware
You may also see a blue screen error as a result of a hardware related problem. To minimise the chances of errors, before proceeding with a Windows 10 installation, disconnect all non-essential peripherals, including external hard drives, printers, secondary monitors, phones, and other USB or Bluetooth devices.
The upgrade process only requires a mouse, keyboard, monitor, and an internet connection.
After the upgrade, you can reconnect the devices to your computer. If you continue with the same problem, you may need to install the latest device driver from your manufacturer support website. In the case that no fix seems to work, then it could be a compatibility issue or the hardware may no longer work.
Perform a clean installation
Perhaps one of the best ways to prevent Blue Screen of Death errors during an upgrade is to erase everything and start from scratch with a fresh copy of Windows 10 performing a clean installation.
Before you can proceed, you have to make sure that your device can start from USB, which means that you may need to change the boot order inside the Basic Input/Output System (BIOS) or Unified Extensible Firmware Interface (UEFI) firmware on your device.
Typically, this process requires hitting one of the function keys (F1, F2, F3, F10, or F12), the ESC, or Delete key as soon as the device starts. The only problem is that these settings will be different per manufacturer, and even by computer model. So make sure to check your device manufacturer's support website for more specific instructions.
While in the firmware interface, find the "Boot" section, and configure the boot order to start from the USB bootable drive, and save the new changes.
To perform a clean installation of Windows 10, use these steps:
Warning: This is a friendly reminder that you'll be making changes to your current setup, which can cause problems and even data loss if you don't do it correctly. It's recommended to make a temporary full backup before proceeding.
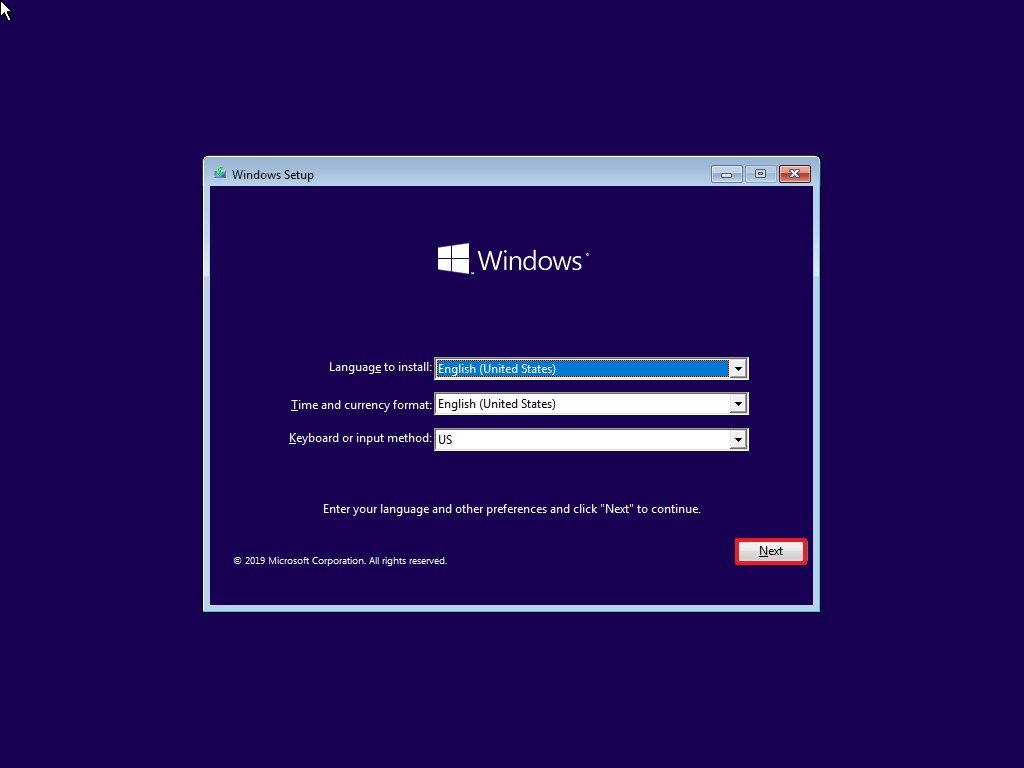
- Start PC with USB flash drive.
- On "Windows Setup," click the Next button.

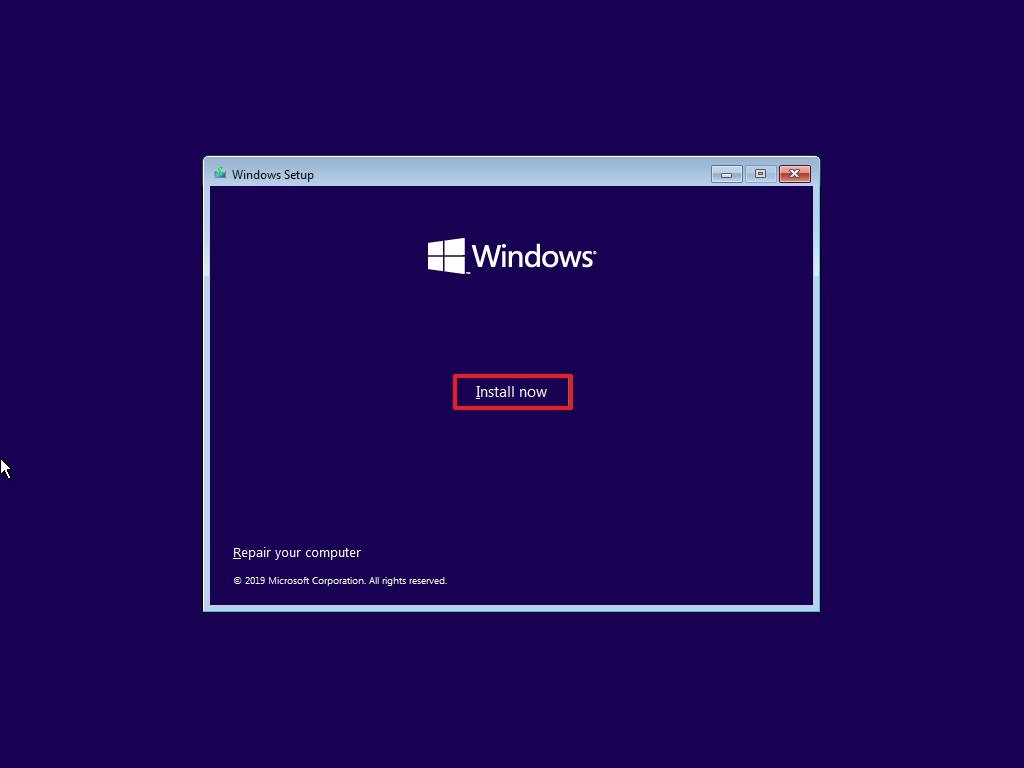
- Click the Install Now button.

- Click the I don't have a product key option to continue (assuming that your PC was already properly activated).

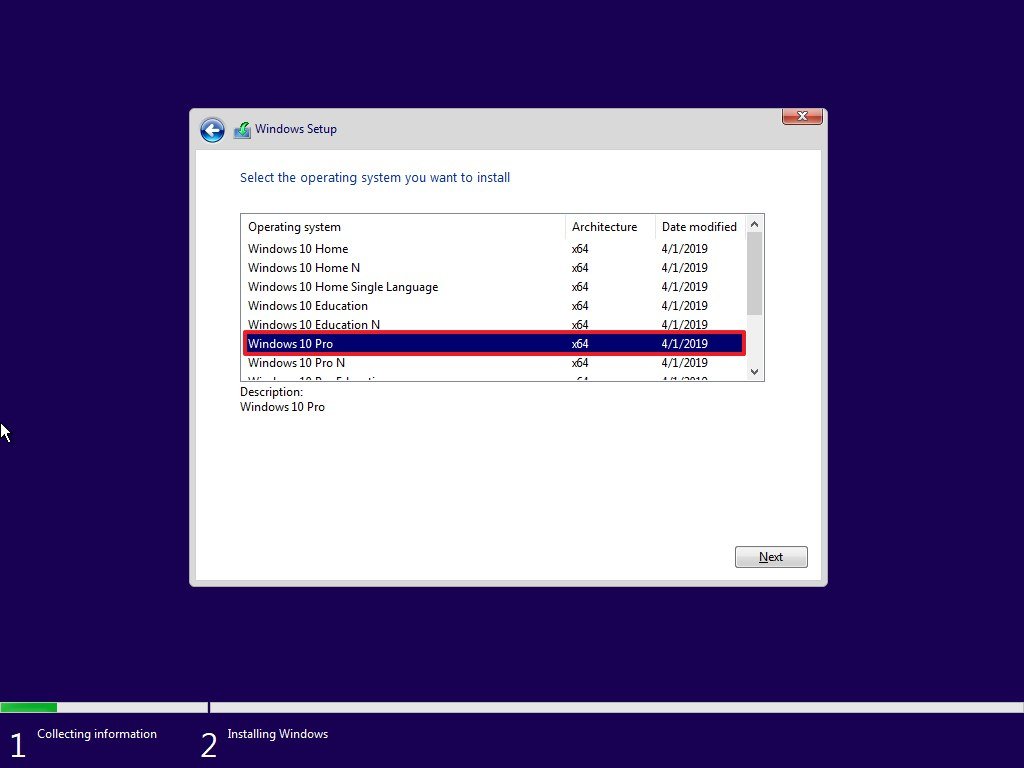
- Select the edition of Windows 10 (if applicable). This selection must match the edition your license activates.

- Click the Next button.
- Check the I accept the license terms option to continue.

- Click the Next button.
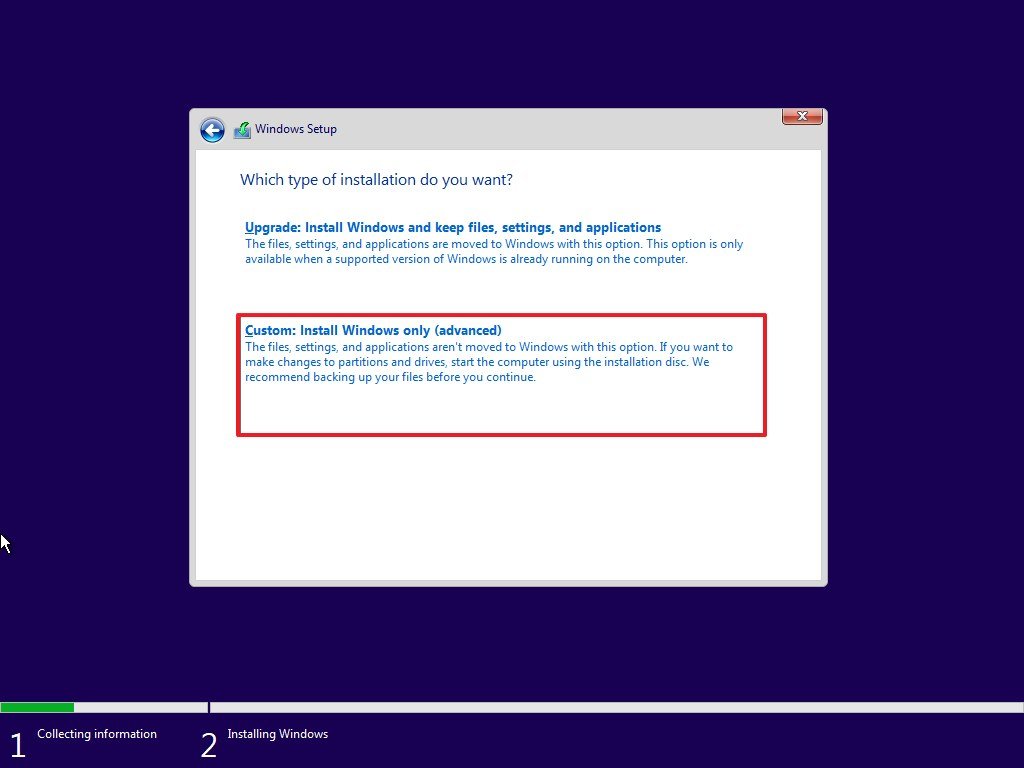
- Click on the Custom: Install Windows only (Advanced) option.

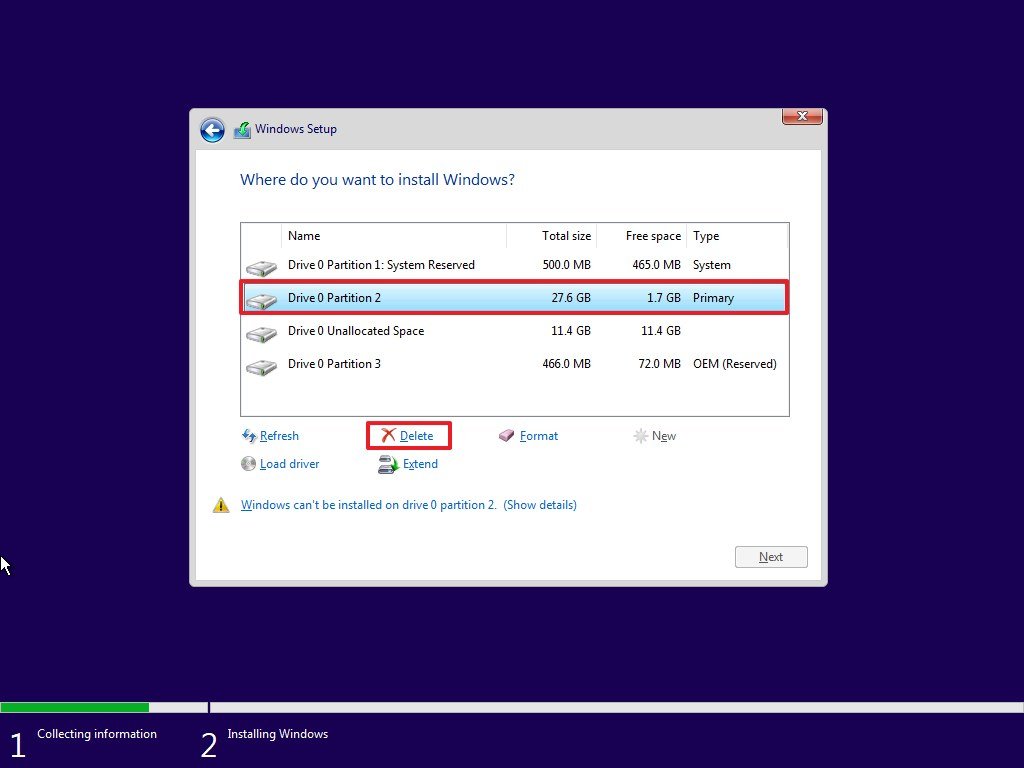
- Select the partition with the current installation of Windows (usually "Drive 0"), and click the Delete button to remove the partition from the hard drive.
 Quick tip: If you have multiple partitions, on the primary hard drive (Drive 0), select and delete each one of them. The setup will recreate the required partitions automatically during the installation process.
 - Select the empty drive labelled "Drive 0 Unallocated Space."
- Click the Next button.


Note: For more helpful articles, coverage, and answers to common questions about Windows 10 Contact Microsoft Support Phone Number +1-800-201-4243
Once you complete the steps, the setup will install a clean copy of Windows 10 minimising the chances of getting a blue screen error. After the installation, you'll need to continue with the on-screen directions to finish setting up the installation creating a new account and selecting your preferred settings.
How to fix blue screen problems with desktop access on Windows 10
If you're randomly getting a Blue Screen of Death message, and you still have access to the desktop, then the problem could be caused by an old driver or your computer may be missing some critical updates. Also, it could be an issue with a recently installed app, driver, or update for Windows 10.
Install updates and drivers
To resolve this problem, make sure that the device has the latest updates for Windows 10 and drivers.
Updating Windows 10
Although Windows 10 downloads and installs updates automatically, there's a chance that some updates may still be missing from your computer.
To install the latest updates on Windows 10, use these steps:
- Open Settings.
- Click on Update & Security.
- Click on Windows Update.
- Click the Check for updates button.

- Note: For more helpful articles, coverage, and answers to common questions about Windows 10 Contact Microsoft Support Phone Number +1-800-201-4243

If there's an update available, but it's not downloading, then try to download and install the missing quality update manually.
Updating drivers
In the case that you're getting stop error as a result of an outdated driver, you can install the latest update with these steps:
- Open Start.
- Search for Device Manager and click the top result to open the experience.
- Expand the category with the problem.
- Right-click the device and select the Update driver option.

- Click the Search automatically for updated driver software option.


If there's a newer version of the driver, it'll download and install automatically. However, it takes time for new drivers to become available through Windows Update. If the instructions don't fix the blue screen error, the next step would be to check your device manufacturer's support website to download and install a newer (or beta) version of the device driver.
Uninstall system updates, drivers, and apps
BSoD can also happen when manufacturers or Microsoft release buggy updates for drivers or Windows 10.
Remove Windows 10 updates
If your device received a buggy update, and you have access to the desktop, use these steps to remove the update:
- Open Settings.
- Click on Update & Security.
- Click the View update history option.

- Click the Uninstall updates option.

- Select the most recent update.

- Click the Uninstall button.


After you complete the steps, the problematic update will be removed from your computer fixing the Blue Screen of Death. You can also use these steps to prevent Windows Update from trying to download and install the same update again.
Although the above steps will help you deal with problematic updates, starting with the May 2019 Update (version 1903), Windows 10 can detect and remove buggy updates automatically, and it'll even block the same update for a month until a replacement update releases fixing the problem.
Remove device drivers
If the error appears after installing a device driver, you can remove it with these steps:
- Open Start.
- Search for Device Manager and click the top result to open the experience.
- Expand the category with the problem.
- Right-click the device and select the Uninstall device option.

- Click the OK button.

Once you complete the steps, you should no longer see blue screen errors on your computer.
Rollback driver
Alternatively, you can rollback to a previous version of a driver (if the option is available), instead of removing it using these steps:
- Open Start.
- Search for Device Manager and click the top result to open the experience.
- Expand the category with the problem.
- Right-click the device and select the Properties option.

- Click the Driver tab.
- Click the Roll Back Driver button (if available).

- Select an option to answer the question.
- Click the Yes button.


After you complete the steps, the current driver will be replaced with an older version that may fix the stop error issue on your device.
Remove apps
Sometimes, you may install an app that isn't compatible with your version of Windows 10, and as a result, you may end up with blue screens at random times or every time that you launch the app.
You can quickly resolve this issue by checking your software support website for a new update that fixes the compatibility issue. However, if there's not an update available, it's recommended to remove the application with these steps:
- Open Settings.
- Click on Apps.
- Click on Apps & features.
- Select the app that may be causing issues and click the Uninstall button.
- Click the Uninstall button again.
- Continue with the on-screen directions (as needed).
Once you complete the steps, the app you selected will be removed entirely from your computer hopefully fixing the stop error issue.
Disconnect unnecessary hardware
Occasionally, you may see a Blue Screen of Death message after connecting a new piece of hardware (such as a graphics card or USB device). When this happens, usually, it's one of three things: the hardware isn't compatible with the version of Windows 10, the hardware is broken, or for some reason, the system is trying to install the wrong driver.
If the hardware isn't compatible, contact your manufacturer to find out if there's a workaround, or if there's a newer model or a suitable replacement.
In the case the hardware doesn't work, then you'll need to get a replacement as required.
Finally, if the system is trying to install wrong drivers, use the above steps to remove the driver, and download and install the latest compatible driver from your manufacturer's support website (and use their instructions).
How to fix blue screen problems without desktop access on Windows 10
Although when you see a Blue Screen of Death error, typically, you can restart your device to continue using the device. Other times, you may not be able to access the desktop to troubleshoot and fix the problem.
If you're unable to access the desktop, you can use System Restore, Safe mode, and even the Advanced startup environment to troubleshoot the issue.
Quick tip: When your device refuses to start with a blue screen message after installing new hardware, try disconnecting it to confirm the new device is causing the problem.
Fixing blue screen with System Restore
If System Restore is enabled and configured, you can use a restore point to undo changes that may be causing a stop error with these steps:
Launching Advanced startup from boot
To launch the Advanced startup settings, use these steps:
- Start your PC.
- As soon as the Windows logo appears on your screen, press the power button to interrupt the boot sequence.

- Repeat steps No. 1 and 2 two more times.
After the third interruption, Windows 10 will open into the Advanced Startup environment, and then you can continue with the steps below to use a restore point.
Launching Advanced startup from USB
Alternatively, you can use a Windows 10 installation media to open Advanced startup using these steps:
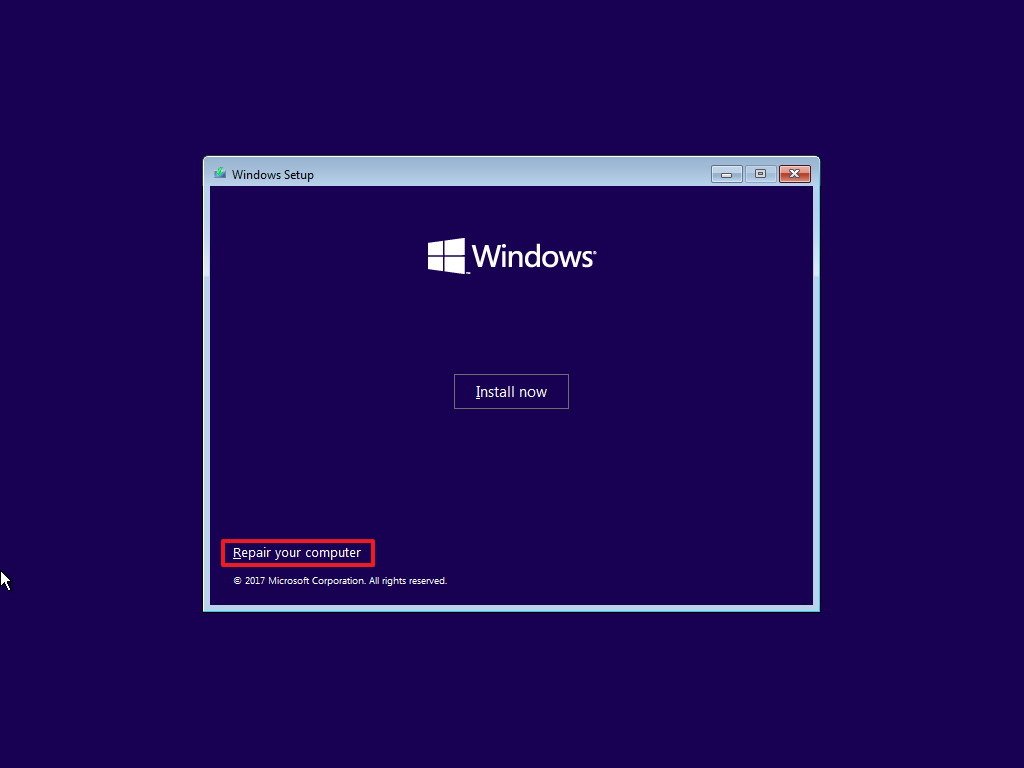
- Start your PC using a USB installation media.Quick tip: If your device isn't starting from USB, you'll need to change your system's BIOS settings to make sure it can boot from USB. Usually, you can access the BIOS by powering up your device and pressing one of the functions, Delete, or ESC keys, but make sure to check your manufacturer's support website for more specific details.
- Click the Next button.
- Click the Repair your computer link in the bottom-right corner.

Once you complete the steps, continue with the Restore Point instructions below.
Using Restore Point to fix stop error
To use a Restore Point to undo system changes, use these steps:
- Click the Advanced Startup option.Quick note: If you're accessing Advanced Startup from a USB media, you'll see the Troubleshoot option instead.
- Click the Troubleshoot option.

- Click the Advanced options button.

- Click the System Restore option.

- Click the Next button.
- Select the most recent known working restore point that you think will resolve the the blue screen problem.

- Click the Scan for affected programs button to determine the apps that will be affected after the restore point was created.
- Click the Close button.
- Click the Next button.
- Click the Finish button.


After you complete the steps, System Restore will remove updates, drivers, and changes configured after the restore point was created without affecting your files to fix the error.
Fixing blue screen with Safe mode
You can also start your computer in Safe mode to uninstall updates, drivers, and undo system changes that may be causing blue screen errors using these steps:
Launching Advanced startup from boot
To launch the Advanced startup settings, use these steps:
- Start your PC.
- As soon as the Windows logo appears on your screen, press the power button to interrupt the boot sequence.
- Repeat steps No. 1 and 2 two more times.
After the third interruption, Windows 10 will open into the Advanced Startup environment, and then you can continue with the steps below to boot in Safe mode.
Launching Advanced startup from USB
Alternatively, you can use a USB bootable media to open Advanced startup using these steps:
- Start your PC using a USB installation media.Quick tip: If your device isn't starting from USB, you'll need to change your system's BIOS settings to make sure it can boot from USB. Usually, you can access the BIOS by powering up your device and pressing one of the functions, Delete, or ESC keys, but make sure to check your manufacturer's support website for more specific details.
- Click the Next button.
- Click the Repair your computer link in the bottom-right corner.
Once you complete the steps, continue with the Safe mode instructions below.
Using Safe mode to fix stop error
When you see a blue screen error, and you can't access the desktop, use these steps to boot in Safe mode:
- Click the Advanced Startup option.Quick note: If you're accessing Advanced Startup from a USB media, you'll see the Troubleshoot option instead.
- Click the Troubleshoot option.
- Click on Advanced options.
- Click the Startup Settings option.

- Click the Restart button.

- After your computer reboots, press F4 (or 4) to select the Enable Safe Mode option.


While in Safe mode, depending on the issue, the steps below will help you to uninstall Windows 10 updates and drivers.
Uninstalling updates
To uninstall a Windows 10 update, use these steps:
- Open Control Panel.
- Click the Uninstall a program option.
- Click the View installed updates option from the left pane.

- Right-click the most recent update.
- Select the Uninstall option.


After you complete the steps, restart your computer to finish the task.
Uninstalling drivers
To uninstall a device driver, use these steps:
- Open Start.
- Search for Device Manager and select the top result to open the experience.
- Expand the device causing the problem.
- Right-click the device and choose the Uninstall device option.

- Click OK to confirm.

Once you complete the steps, reboot your device to finish the task.
If your computer is no longer showing a BSoD message, you can temporarily block the same update or driver from installing automatically again.
Using Advanced startup
Alternatively, Windows 10 also includes a feature that allows you to remove the most recent updates for the Advanced startup environment without the need to use System Restore or Safe mode using these steps:
Launching Advanced startup from boot
To launch the Advanced startup settings, use these steps:
- Start your PC.
- As soon as the Windows logo appears on your screen, press the power button to interrupt the boot sequence.
- Repeat steps No. 1 and 2 two more times.
After the third interruption, the device should boot into Advanced Startup, and then you can continue with the steps below to remove the most recent updates causing problems.
Launching Advanced startup from USB
Also, you can use a USB bootable media to get to the Advanced startup settings using these steps:
Note: For more helpful articles, coverage, and answers to common questions about Windows 10 Contact Microsoft Support Phone Number +1-800-201-4243
- Start your PC using a USB installation media.Quick tip: If your device isn't starting from USB, you'll need to change your system's BIOS settings to make sure it can boot from USB. Usually, you can access the BIOS by powering up your device and pressing one of the functions, Delete, or ESC keys, but make sure to check your manufacturer's support website for more specific details.
- Click the Next button.
- Click the Repair your computer link in the bottom-right corner.
Once you complete the steps, continue with the instructions below to uninstall a quality or feature update.
Removing quality and feature updates
To uninstall the latest quality or feature update causing blue screens, use these steps:
Note: For more helpful articles, coverage, and answers to common questions about Windows 10 Contact Microsoft Support Phone Number +1-800-201-4243
- Click the Advanced Startup option.Quick note: If you're accessing Advanced Startup from a USB media, you'll see the Troubleshoot option instead.
- Click the Troubleshoot option.
- Click on Advanced options.
- Click the Uninstall Updates options.

- Click the Uninstall latest quality update option.
 Quick tip: You can also select the Uninstall latest feature update option and continue with same steps to remove the recent upgrade of Windows 10 (as long as it's been less than ten days since the installation).
 - Note: For more helpful articles, coverage, and answers to common questions about Windows 10 Contact Microsoft Support Phone Number +1-800-201-4243
- On reboot, sign-in with your credentials.
- Click the Uninstall quality update button.

- Click the Done button.

- Click the Continue option.


After you complete the steps, Windows 10 will remove the latest quality update or feature update potentially fixing the Blue Screen of Death on your device.
Wrapping things up
Although when a Blue Screen of Death error appears is never a good sign, there are many troubleshooting steps that you can try to get up and running quickly. However, if none of the suggestions seems to work, then it's time to contact your device manufacturer for assistance. Even better, you can use the Windows Central forums to find help.
In addition to blue screen, Windows 10 may also show black screen, which is a problem usually related to the graphics driver, connection issues, or installation. If you're experiencing screen flickering, then you're likely seeing a problem with a video driver or app.
More Windows 10 resources
Note: For more helpful articles, coverage, and answers to common questions about Windows 10 Contact Microsoft Support Phone Number +1-800-201-4243
Tags: #HowToRemove #HowToRemoveDealply #RemoveDeltaSearch #Dealply #HowToRemoveConduitToolbar #ConduitToolbar #DeltaSearch #MalwareRemoval #Malware #VirusRemoval #HitmanPro #AntiMalware #Adware #InternetExplorer #GoogleChrome #Chrome #MozillaFirefox #MicrosoftEdge #MicrosoftEdgeSupport ##MicrosoftEdgeSupportNumber #AskToolbar #HowToRemoveAskToolbar
#Microsoft #MicrosoftSupport #MicrosoftSupportNumber #MicrosoftSupportPhoneNumber #MicrosoftTechSupport #MicrosoftTechSupportNumber #MicrosoftTechSupportPhoneNumber #MicrosoftTechnicalSupport #MicrosoftTechnicalSupportNumber #MicrosoftTechnicalSupportPhoneNumber #MicrosoftCustomerSupport #MicrosoftCustomerSupportNumber #MicrosoftCustomerSupportPhoneNumber #MicrosoftCustomerService #MicrosoftCustomerServiceNumber #MicrosoftCustomerServicePhoneNumber #MicrosoftCustomerCare #MicrosoftCustomerCareNumber #MicrosoftCustomerCarePhoneNumber #MicrosoftHelp #MicrosoftHelpNumber #MicrosoftHelpPhoneNumber #MicrosoftHelpline #MicrosoftHelplineNumber #MicrosoftHelplinePhoneNumber #MicrosoftHelpDesk #MicrosoftHelpDeskNumber #MicrosoftHelpDeskPhoneNumber
#Windows #WindowsSupport #WindowsSupportNumber #WindowsSupportPhoneNumber #WindowsTechSupport #WindowsTechSupportNumber #WindowsTechSupportPhoneNumber #WindowsTechnicalSupport #WindowsTechnicalSupportNumber #WindowsTechnicalSupportPhoneNumber #WindowsCustomerSupport #WindowsCustomerSupportNumber #WindowsCustomerSupportPhoneNumber #WindowsCustomerService #WindowsCustomerServiceNumber #WindowsCustomerServicePhoneNumber #WindowsCustomerCare #WindowsCustomerCareNumber #WindowsCustomerCarePhoneNumber #WindowsHelp #WindowsHelpNumber #WindowsHelpPhoneNumber #WindowsHelpline #WindowsHelplineNumber #WindowsHelplinePhoneNumber #WindowsHelpDesk #WindowsHelpDeskNumber #WindowsHelpDeskPhoneNumber
#Outlook #OutlookSupport #OutlookSupportNumber #OutlookSupportPhoneNumber #OutlookTechSupport #OutlookTechSupportNumber #OutlookTechSupportPhoneNumber #OutlookTechnicalSupport #OutlookTechnicalSupportNumber #OutlookTechnicalSupportPhoneNumber #OutlookCustomerSupport #OutlookCustomerSupportNumber #OutlookCustomerSupportPhoneNumber #OutlookCustomerService #OutlookCustomerServiceNumber #OutlookCustomerServicePhoneNumber #OutlookCustomerCare #OutlookCustomerCareNumber #OutlookCustomerCarePhoneNumber #OutlookHelp #OutlookHelpNumber #OutlookHelpPhoneNumber #OutlookHelpline #OutlookHelplineNumber #OutlookHelplinePhoneNumber #OutlookHelpDesk #OutlookHelpDeskNumber #OutlookHelpDeskPhoneNumber
#Office365 #Office365Support #Office365SupportNumber #Office365SupportPhoneNumber #Office365TechSupport #Office365TechSupportNumber #Office365TechSupportPhoneNumber #Office365TechnicalSupport #Office365TechnicalSupportNumber #Office365TechnicalSupportPhoneNumber #Office365CustomerSupport #Office365CustomerSupportNumber #Office365CustomerSupportPhoneNumber #Office365CustomerService #Office365CustomerServiceNumber #Office365CustomerServicePhoneNumber #Office365CustomerCare #Office365CustomerCareNumber #Office365CustomerCarePhoneNumber #Office365Help #Office365HelpNumber #Office365HelpPhoneNumber #Office365Helpline #Office365HelplineNumber #Office365HelplinePhoneNumber #Office365HelpDesk #Office365HelpDeskNumber #Office365HelpDeskPhoneNumber.
#TheGodfather #StarWars #PulpFiction #TheShawshankRedemption\ #ForrestGump #TheDarkKnight #Batman #Superman #Flash #Avatar #Arrow #Joker #Gladiator #Avenger #TheMatrix #Titanic #FightClub #JurassicPark #TheLordOfTheRings #Rocky #Rambo #American #NaughtyAmerica #PornHub #Terminator #TomHnaks #Inception #DanBrown #Alien #BenHur
No comments:
Post a Comment