How to Remove Delta Search from Computer Browser
Many users have been tricked into installing third-party Delta Search toolbars that overwrite default settings in their browsers as google chrome, Mozilla Firefox, Internet Explorer or any other. As the home page or the preferred search engine gets replaced by Delta Search\. We have tracked and identified the toolbars most commonly found on our users' computers and have devised a set of removal procedures.
Delta Search Toolbar is one of the most commonly found and aggressive toolbars. It comes bundled with other software that you might never use or find useful, such as MixiDJ and Browser Protect.
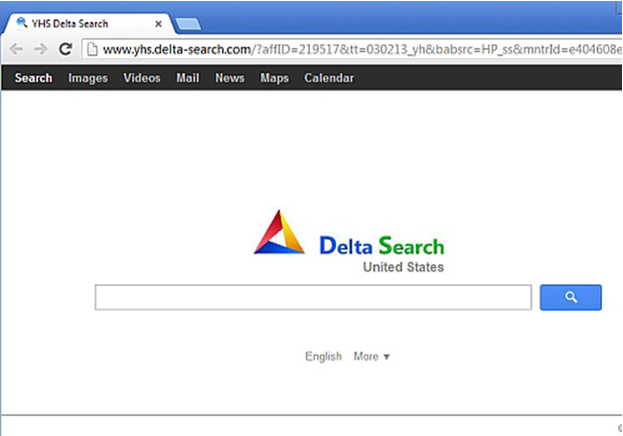
The program has been flagged as potentially unwanted because it changes your default search engine to delta-search.com, initiates browsing redirections, alters your search results and features numerous ads. It will also replace your home page with the Delta home page and add a toolbar to your browser.
Because of its behavior, people tend to consider it malware and are surprised that their antivirus software won’t remove it. However, technically the toolbar is not malware. Like other similar programs, it has to be uninstalled and the remaining traces need to be removed manually.
For Instant Help and Support Dial our Customer Service Number on +1-800-201-4179
For Instant Help and Support Dial our Customer Service Number on +1-800-201-4179
For this, you will need to follow the instructions below: Uninstall Delta Search
For this you will need to follow the instructions below: Uninstall Delta Search
- Access the Run command by pressing the Windows logo key
 + R
+ R - Type appwiz.cpl in the Run text box and hit Enter
- Look for Delta Search in the list of installed programs, then double-click on it to uninstall it.
Follow the same uninstall process for each of the following: Delta Chrome Toolbar, Delta toolbar, Yontoo, BrowserProtect, and Mixi.DJ.
Search for each of these programs and uninstall them one by one.
Remove the Delta Search toolbar from your internet browser(s)
After the toolbar is completely uninstalled, traces of it will still be present in your web browser. You will need to manually remove these traces.
Remove Delta Search from Internet Explorer
For Instant Help and Support Dial our Customer Service Number on +1-800-201-4179
For Instant Help and Support Dial our Customer Service Number on +1-800-201-4179
- Remove Delta Toolbar from the Add-ons manager
- Open Internet Explorer.
- Click on the Tools icon
 (Cogwheel) and select Manage add-ons.
 - Under Add-on Types, select Toolbars and Extensions.
- In the right pane, select Delta Toolbar & Delta helper Object and click on the Disable button.
Remove Delta Search from default search engines
- Open Internet Explorer.
- Click on the Tools icon (Cogwheel) and select Manage add-ons.
- Under Add-on Types, select Search Providers.
- Select Delta Search and click the Remove button.
- Select Delta Search and click the Remove button.
Remove the Delta Search home page
- Open Internet Explorer.
- Click on the Tools icon (Cogwheel) and select Internet Options.
- In the General tab, delete the Delta URL from the Home page text box.
- Click OK to save the changes
Attention!
For Instant Help and Support Dial our Customer Service Number on +1-800-201-4179
For Instant Help and Support Dial our Customer Service Number on +1-800-201-4179
If you open a new tab in Internet Explorer and it still displays Delta Search as the home page, do the following:
- Open Internet Explorer, click on the Tools icon (Cogwheel), and select Internet Options.
- In General tab, click the Tabs button (in the Tabs section).
- In the new window, go to the drop down menu and select the option: Your first home page.
- Click OK, Apply and OK in the next window as well.
- Restart Internet Explorer.
For Instant Help and Support Dial our Customer Service Number on +1-800-201-4179
Remove Delta Search from Mozilla Firefox
- Open Mozilla Firefox.
- From the Firefox orange button (or from the standard Tools menu), click on Add-ons.
- Make sure Extensions is selected in the Add-ons manager left side menu bar
- Disable or remove the Delta Toolbar add-on
- Restart the browser.
Remove Delta Search from default search engines
- Open Mozilla Firefox.
- Click inside the Search text field and press the F4 key
- Select Manage Search Engines from the drop down list
- Select Delta Search and click the Remove button.
Remove the Delta Search home page
- Open Mozilla Firefox.
- From the Firefox orange button (or from the standard Tools menu), select Options.
- In the General tab, delete the Delta URL from the home page text box.
- Click OK to save the changes.
Remove the Delta Search home page from New Tab
If you open a new tab in Firefox and Delta Search as home page, do the following:
- Type: about:config in the address bar and press enter
- Confirm the message.
- Type: browser.newtab.url in the Search text field
- Right-click on the result and select Toggle (or Reset in older versions)
Remove Delta Search from Google Chrome
- Remove the Delta Toolbar Extension
- Open Chrome.
- Click on the Chrome menu
 and select Settings.
 - Click on Extensions in the left side menu.
- Remove/Disable the Delta Toolbar.
Remove Delta Search from default Search engines
- From the Chrome menu , select Settings.
- In the Search section, click Manage search engines and remove Delta Search from the default search engines list.
- Click OK to save the changes.
Remove the Delta Search home page
- Open Chrome.
- In the Chrome menu , select Settings.
- In the On Startup section, Click on Set Pages and delete the Delta URL (you can set a different home page by entering a URL of your choice).
- Click Ok to save the changes.
- In the Appearance section, click on Change and delete the Delta URL (you can set a different home page).
- Click Ok to save the changes.
Computer troubles? When your PC is acting up, call Bitdefender Tech Assist. We are a team of computer experts, always available to give full personal attention to your PC needs. Tech Assist is available 24/7. Just select the service that fits your needs, and our tech geniuses will do all the work via an ultra-secure remote connection. We save you time and energy so you can focus on what's really important for you
Tags: #HowToRemove #HowToRemoveDealply #RemoveDeltaSearch #Dealply #HowToRemoveConduitToolbar #ConduitToolbar #DeltaSearch #MalwareRemoval #Malware #VirusRemoval #HitmanPro #AntiMalware #Adware #InternetExplorer #GoogleChrome #Chrome #MozillaFirefox #MicrosoftEdge #MicrosoftEdgeSupport ##MicrosoftEdgeSupportNumber #AskToolbar #HowToRemoveAskToolbar
#Microsoft #MicrosoftSupport #MicrosoftSupportNumber #MicrosoftSupportPhoneNumber #MicrosoftTechSupport #MicrosoftTechSupportNumber #
#Windows #WindowsSupport #WindowsSupportNumber #WindowsSupportPhoneNumber #WindowsTechSupport #WindowsTechSupportNumber #WindowsTechSupportPhoneNumber #WindowsTechnicalSupport #WindowsTechnicalSupportNumber #
#Outlook #OutlookSupport #OutlookSupportNumber #OutlookSupportPhoneNumber #OutlookTechSupport #OutlookTechSupportNumber #OutlookTechSupportPhoneNumber #OutlookTechnicalSupport #OutlookTechnicalSupportNumber #
#Office365 #Office365Support #Office365SupportNumber #Office365SupportPhoneNumber #Office365TechSupport #Office365TechSupportNumber #
No comments:
Post a Comment